Table of Contents

Advertisement
Designers love Figma for its simplicity and collaborative power. But when it comes to editing photos, most people still switch between external apps like Photoshop or Canva. That constant back-and-forth wastes time, breaks your workflow, and clutters your files.
The good news? You can now edit images directly inside Figma—without leaving your design file. With the right plugins, you can crop, retouch, remove backgrounds, apply filters, and even enhance images with AI—all on your canvas.
In this article, we’ll show you how to transform your workflow by editing images right where you design.
Why Edit Images Inside Figma?
Keeping everything in one place has huge advantages:
- Save Time: No exporting, no switching tools.
- Stay Focused: Keep your creative flow uninterrupted.
- Collaborate Faster: Share editable results with teammates instantly.
- Simplify Workflow: Reduce the number of apps you juggle.
Basic Image Editing in Figma
Figma itself includes some basic image controls:
- Crop and mask images directly on the canvas.
- Adjust opacity for subtle effects.
- Apply fills and overlays for quick styling.
While handy, these tools are limited. If you need professional-level adjustments, that’s where plugins like Lutify come in.
Advanced Image Editing With Plugins
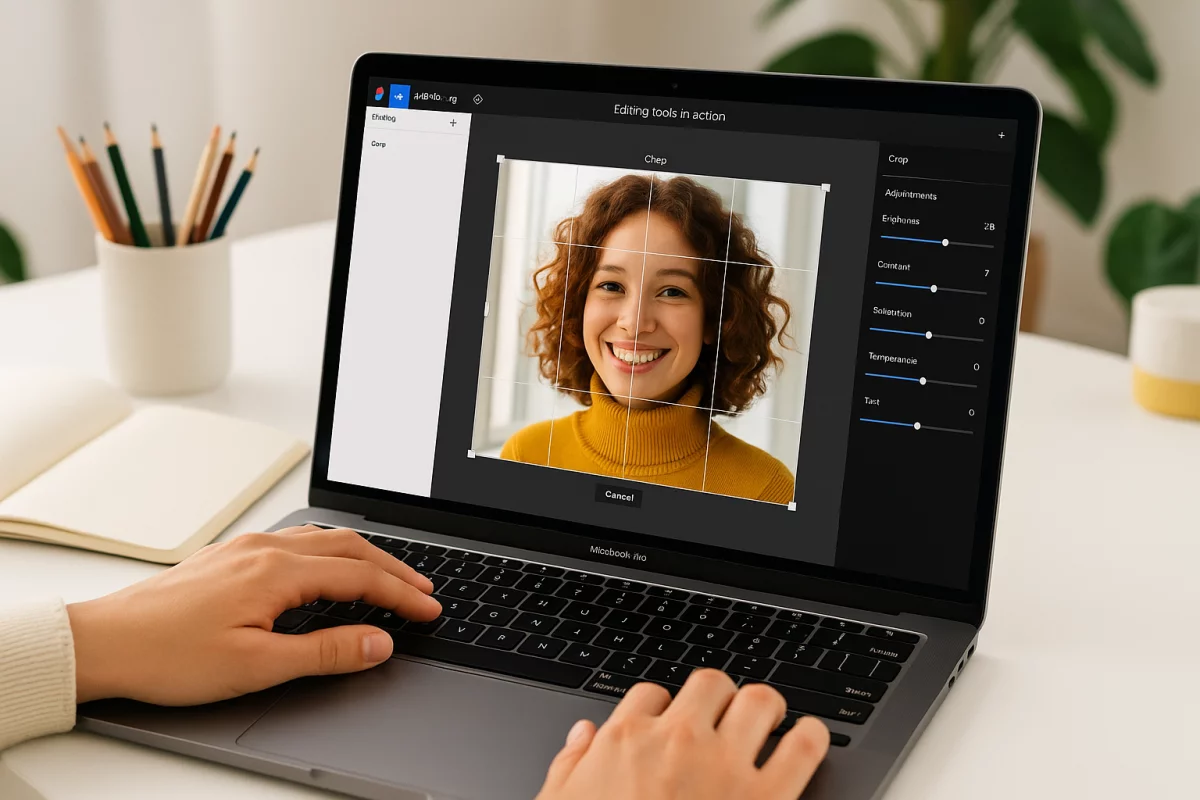
1. Crop, Rotate, and Adjust
With Lutify, you can crop, rotate, flip, and fine-tune exposure and contrast—all without leaving your design.
2. Retouch and Enhance Photos
Need to sharpen an image, reduce noise, or restore detail? AI-powered retouching helps polish your photos instantly.
3. Remove Backgrounds in One Click
Instead of manually masking, you can remove a photo background with AI in seconds. Perfect for mockups, product shots, or profile images.
4. Upscale for Higher Quality
Sometimes your assets are too small or pixelated. Lutify’s AI upscaler increases resolution while preserving detail—ideal for presentations or exports.
5. Apply Filters and Presets
Want cinematic color grading? Just apply ready-made filters and presets to give your visuals a professional look instantly.
How to Get Started
- Install Lutify from the Figma Community.
- Open your design file and select an image.
- Launch the plugin and choose the tool you need—crop, retouch, upscale, or background remover.
- Apply changes and watch them appear directly in your canvas.
Final Thoughts
Editing images directly inside Figma saves you from constant tool switching and makes your design process smoother. Whether you need quick adjustments or AI-powered enhancements, tools like Lutify bring everything into your workflow.
Next time you’re designing, try skipping Photoshop—you might not need to leave Figma at all.